To configure a Study Event:
- Change your scope to be at the Study level, if needed.
- Click the Tasks menu in the Navigation Bar.
- Click Build Study.
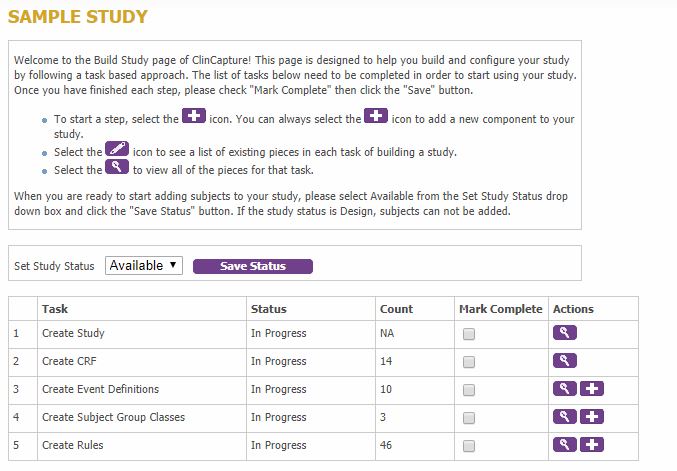
- Click the + icon on row 3 Create Event Definitions.
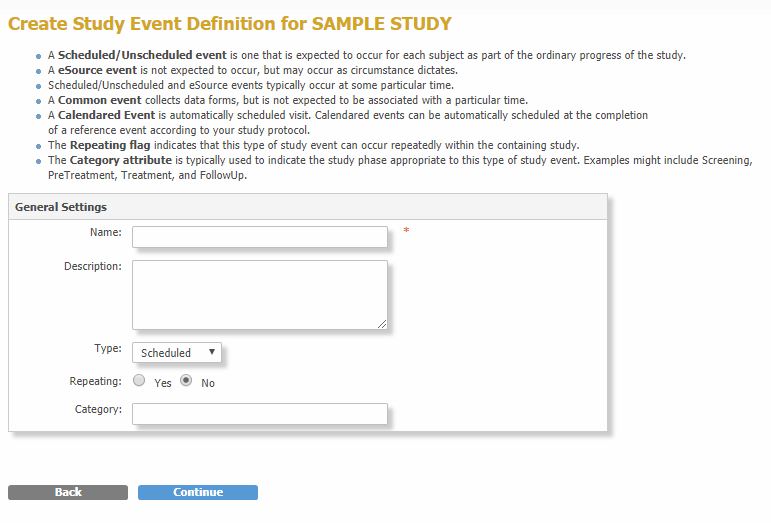
- Enter the event Name.
- Enter a Description, if needed.
- Select an event Type:
- Scheduled
- Unscheduled
- eSource (available only if the eSource feature is enabled)
- Common
- Calendared.
- Select Yes if the event is Repeating, for example an unscheduled office visit.
- Enter a Category, to associate related events, for example Follow-up Visits.
- Click Continue to attach Event CRFs.
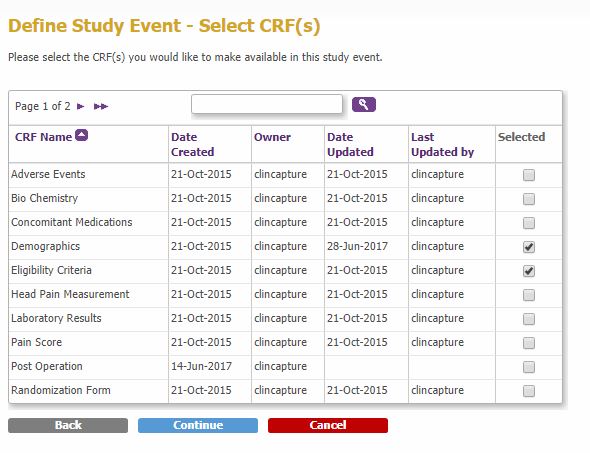
- Select the CRFs to be attached to the event and click Continue to configure the Event CRFs.

Property Description Required If checked, the CRF must be completed to complete the event.
If unchecked, CRF completion is optional.Password Required If checked, a valid password is required to save the CRF data. Default Version Select the default version to be promoted in the Subject Matrix to the data entry user. The default version is applicable only if multiple CRF versions are available for data entry. Hide CRF If checked, the CRF is not hidden when the user scope is at the site level. Source Data Verification See Configuring Source Data Verification. Accept New CRF Versions For Sites If checked, newly published CRF versions are immediately available for data entry by site users. Data Entry Quality Double Data Entry: Requires the data to be entered twice by different users, or by the same user with a 72 hrs period between data entries. CRF data evaluation: Requires the data to be evaluated by a Study Evaluator user. Changed data triggers an automatic discrepancy.
Send Email when CRF is Complete If checked, an email to send the completed CRF must be provided. Tabbing inside tables Select Left to Right or Top to Bottom to control cursor movement inside tabled. - Click Continue to confirm the event configuration, then Submit.
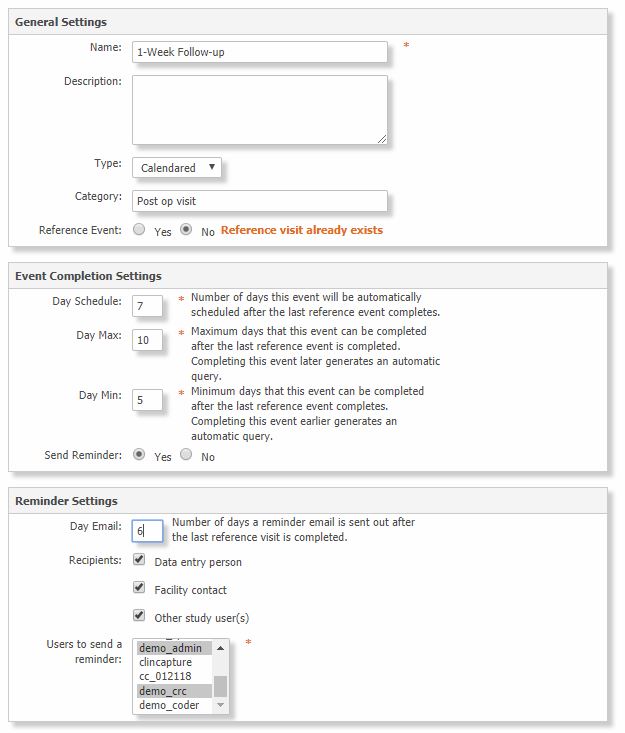
Note: If the event type is Calendared, additional configuration is required.
| Property | Description |
|---|---|
| Reference Event | Select Yes if the event is the reference date for the follow-up events schedule. For example, the completion of the Surgery event may be the reference date for the 24-Hrs, 1-Week and 1-Month follow up events. |
| Day Schedule | Enter the number of days the event will be automatically scheduled after the reference event completes. For example enter 7 for the 1-Week Follow-Up event. |
| Day Max | Enter the maximum days that this event must be completed after the reference event is completed. Completing this event later generates an automatic query. This number must be greater than Day Schedule. |
| Day Min | Enter the minimum days that this event must be completed after the reference event completes. Completing this event earlier generates an automatic query. This number must be smaller than Day Schedule. |
| Send Reminder | Click Yes to send an email reminder. |
| Day Email | Enter the number of days to send the email after the reference event completes. This number must be equal or smaller than Day Min. |
| Recipients | Check the users to receive the reminder email:
|